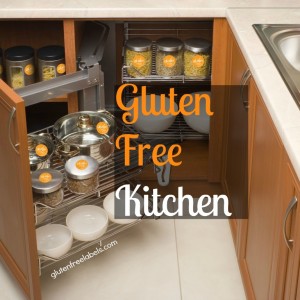
Gluten Free Kitchen
If you’re gluten sensitive or living a gluten free lifestyle, the sooner you set up a gluten free kitchen, the better. A gluten free kitchen is even more critical if you are sharing a kitchen with other gluten-consuming members of your household. The threat of gluten cross-contamination and the resulting health effects are a very real possibility in a shared kitchen.
The good news: it really is possible to share a kitchen if you are living gluten free, but both you and everyone else who uses that kitchen will need to follow some strict rules to keep you safe. A shared gluten free kitchen will only work if everyone in the household is completely on board with the goal of keeping you healthy and away from gluten. Here are the gluten free kitchen essentials:
The secret to a gluten free kitchen? Put gluten in the corner and keep it there.
Gluten has a way of spreading itself around, especially in the kitchen. The most successful shared kitchen arrangements not only separate gluten-containing foods and cooking tools from gluten free foods and cooking tools, but actually banish gluten-containing items to one corner.
In other words: In your new shared gluten free kitchen, foods that contain gluten and the cooking tools used with them should occupy one corner and stay in that corner, while the rest of the kitchen remains gluten free. That way crumbs and other gluten residue remain in one area of the kitchen. Simply avoid that area and you should remain safe. Gluten Free Labels has “do not eat” labels to remind gluten free children what they can and can’t consume that is gluten free.
 Pick an area of the kitchen for the gluten-containing foods that’s relatively removed from the rest of the work areas. Once you’ve chosen it, make sure everyone in the house understands that they cannot work with gluten foods anywhere but this space. Obviously, they’re allowed to bring gluten food on plates to eat at the table, but they also need to watch out for crumbs and clean up after themselves.
Sharing a refrigerator in your gluten free kitchen
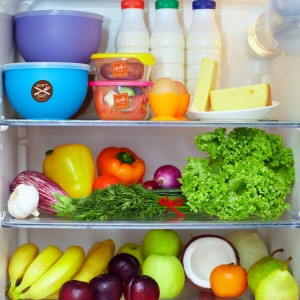
In an ideal world your gluten free kitchen would have separate refrigerators: one for gluten-containing foods and one that’s gluten free. But of course that’s not practical for most of us.
So here’s how to share a refrigerator in your gluten free kitchen. Start by designating the top shelf as entirely gluten free. No gluten-containing foods can be placed on that shelf (and since no foods will be above yours, no crumbs can drift down onto your foods, either).
Next, clearly and carefully label all of your foods as gluten free is a gluten free kitchen essential. It is especially critical to label jars and other containers of condiments such as butter, mayonnaise, mustard and jelly. Gluten Free Labels make it easy to designate foods, condiments, tools and more as gluten free. With highly-visible stickers, write-on labels, waterproof tags, toothpick flags and more, Gluten Free Labels brings a new level of safety to your gluten free kitchen.
Finally, make gluten free kitchen rules. Educate everyone in the house that they cannot use your condiments as part of a meal that includes gluten. Even just touching the tip of a squeeze bottle to a piece of gluten bread could lead to a reaction that takes days to recover from.
Sharing the sink in your gluten free kitchen
Despite it’s clean reputation, the kitchen sink is a hotbed of gluten exposure. Take the kitchen sponge. At close inspection, you’ll see a used kitchen sponge harbors all sorts of food debris even if you wash it out carefully. To avoid contaminating plates, pans and other utensils while cleaning, use your own sponge and keep it someplace separate from the “community” sponge. The same goes for scrubbies or anything else you use to clean dishes. Pick one color sponge for gluten free use, another color for community use and keep it consistent to avoid mix-ups. Add a Gluten Free Labels tag and add it to your sponge suction holder inside your sink to differentiate between your gluten containing sponge and your gluten free sponge.
Dish towels are another secret source of gluten in a gluten free kitchen, as people use it to wipe their hands or clean off the counter. Again, choose a color for your own gluten free dish towels and educate everyone in the house not to use that color towel.
Additional steps to for a gluten free kitchen:
>Dispose of flour and baking supplies for gluten free kitchen safety
Gluten-containing flour and baking mixes pose a special hazard in your gluten free kitchen. Throw them away or give them away immediately. Handle them carefully to make certain you don’t allow any to escape into the air – if you breathe in flour or swallow even the tiniest bit, you’ll be surprised at how sick you can get.
>Purchase new condiments for your gluten free kitchen
Any opened condiments in your refrigerator or cabinets most likely contain some cross-contamination in the form of gluten crumbs, so purchase a full supply of new gluten-free jars, including jam and jellies, mustard, ketchup, peanut butter, margarine and mayonnaise, and anything else you enjoy using. Be sure to label your new condiments so that friends or family members don’t cross contaminate something inadvertently. Gluten Free Labels are the perfect solution, with bright, highly-visible labels that will stop even the gluten-ignorant in their tracks.
>Get a new toaster for gluten free kitchen safety
Yes, you need a new toaster. Keep your old toaster for the designated gluten corner of your kitchen and place your new toaster in the gluten free area of your kitchen. For extra safety, label your gluten free toaster with an oven-safe silicone tag from Gluten Free Labels. Better to be safe than sorry.
> Clean your oven to remove gluten residue
Most people don’t clean their ovens all that frequently, and that means lots of old gluten floating around the floor of your oven. Self-cleaning ovens clean at a temperature that should destroy the gluten protein, but if you have a non-self-cleaning oven, you’ll have to make sure you scrub everything — especially the racks — really, really well. Also, be sure to clean the drawer under the oven, since that frequently harbors crumbs.
Source: About.com

